Thursday, March 1, 2012

Autumn / Embracing a new season brings new opportunities

Happy Autumn to everyone in the Southern Hemisphere and Happy Spring to those in the Northern Hemisphere. Our favourite seasons are Autumn and Spring. We love the vibrant rustic colours of Autumn and the blossoms and promise of new life that Springs brings us. We look forward to cooking some delicious dishes throughout Autumn, so stay tuned. Here is a favourite Autumn Poem to share with you all;


'Come, little leaves'

"Come, little leaves," said the wind one day,
"Come o'er the meadows with me and play;
Put on your dresses of red and gold,
For summer is gone and the days grow cold."
Soon as the leaves heard the wind's loud call,
Down they came fluttering, one and all;
Over the brown fields they danced and flew,
singing the glad little songs they knew.

By George Cooper


Sunday, February 26, 2012

Caramelised Pear Cake / Desserts

As we launch 'Stressed is Desserts spelled backwards" Sweet Monday desserts, we couldn't think of a better recipe to feature first, than this one! This cake is incredibly moist, luxurious and decadent. The pears goes back beautifully with the caramel, and as we are approaching Autumn/Winter here in the Southern hemisphere, pears are at their absolute best. The perfect dessert to share with neighbours, friends and family. Adrian Richardson (mentioned in an earlier post) is a renowned Melbourne celebrity chef - go to http://www.lalunabistro.com.au/ to find out more about Adrian and his La Luna Bistro.

Caramelised Pear Cake by Adrian Richardson
serves 8-10


Ingredients

2 pears, peeled, cored and cut into small dice
2 tbs brandy or rum
3 eggs
120g caster sugar
160g plain flour
1 tbs baking powder
140g unsalted butter, melted

Caramelised Pears

120g unsalted butter
400g caster sugar
5 pears, peeled, quartered and cored


Combine the diced pears and brandy or rum in a bowl and set aside. Thoroughly butter a kugelhopf tin.


We didn't have one so we used another round cake tin and it worked fine but without the gorgeous patterns of the kugelhopf tin, which does look very impressive!

Cut strips of baking paper about 10cm wide and lay them around the base of the tin, aiming to cover the base and reach a short way up the sides. This will prevent the pears from sticking to the tin.

To make the caramelised pears, melt the butter in a large frying pan. Add the sugar and stir over medium heat until dissolved. Increase the temperature to medium-high heat and cook for 8-10 mins to a golden caramel (it's extremely important that you don't burn the caramel, it will taste bitter - so manage the temperature).

Carefully add the pear quarters (the caramel may splutter and spit, so be careful) and cook for 10-12 mins, tossing the pan gently to coat the pears in caramel - they will release their juices and stop the caramel from burning. Remove the pan from the heat and leave to cool for a few moments. Lift the pears out of the caramel and arrange them overlapping around the base of the tin. Reserve the caramel.

Preheat the oven to 160 degrees. To make the cake, beat the eggs and sugar until pale, thick and creamy. Sift on the flour and baking powder, then gently fold them into the eggs. Drizzle on the melted butter and fold it in. Gently fold in the diced pears and alcohol.

Spoon the batter into the tin to cover the caramelised pears, then drizzle the reserved caramel over the top. Bake for 40 minutes or until a skewer comes out clean (we found the time took a little longer, but that could be because of the tin we used).

Allow the cake to cool in the tin for 5-10mins (this is crucial! Don't try and rush this step! We didn't wait long enough and when we turned the tin upside down we had a little problem...the caramel hadn't set enough and the cake wasn't as stable as it should have been! Lesson learned), then invert it onto a wire rack and leave to cool completely. Carefully peel away the baking paper. Serve the cake with thickened cream - a must :)!

We found our cake to be very moist for a week!

ENJOY! -X-


Saturday, February 25, 2012

Orange juice the old way / Juices

Why post this? Because we love orange juice - only when the oranges are freshly picked from our friends tree and juiced in our own kitchen. A whole lot of goodness, chemical free! Oh and the  oranges  photographed beautifully. 


Freshly squeezed Orange juice...the old way! Perfect start to the day to enjoy with our weekend breakfast feast 'Poached eggs with a rich Tuscan bean sauce'

Orange Juice the old way
serves 2


5 organic oranges halved

squeeze orange halves to make 500 mls of orange juice

ENJOY! -X-


Organic poached eggs with Tuscan beans cooked in tomato, garlic & sage / Weekend Breakfast Feasts

Our Weekend Breakfast Feast
Organic poached eggs with Tuscan beans cooked in tomato, garlic & onion
Serves 4


Every Saturday, in celebration of the weeks-end, we love to prepare a noshy cooked breakfast packed with flavour. We always find cooking cathartic, and what better way to refresh & re-energize than cooking a beautiful Saturday breaky!

The cooked beans in tomato, garlic & sage ( traditionally known as fagiolli all' uccelletto ) is our own - tried and tested over many months, using varying ingredients and methods. We think we've got it pretty right - the flavour is rich & luxuriant, the colour and textures an ode to its Tuscan roots. It is a hearty, rustic mix of flavours we know you will love.

Try these with organic poached eggs on a great sour dough loaf and you will never turn back!

1. Beans cooked in tomato, garlic & onion

Ingredients

500g dried red kidney beans
 (if time poor can use tinned)
500g dried white butter beans 

(if time poor can use tinned)
2 x 400g tinned Italian tomatoes
1/2 large red capsicum finely diced
200ml tomato passata
3 garlic cloves finely chopped
1/2 onion, finely diced
 (refer to our post "Cutting onions without tears")
2 tsp mild organic chilli paste
(feel free to turn up the heat if you love the hot stuff)
6 large fresh sage leaves
2 large springs of fresh thyme
90ml extra virgin olive oil
2 anchovies
Sea salt & ground black pepper

If using dried beans, soak them in water for 6-7 hours or overnight. The drain, rinse and cook them in plenty of simmering water until soft - about 1 1/2 hours - then drain them and set aside.

Prepare your "mise en place" - (everything in its place) of garlic, onion, chilli paste and capsicum.


Put the garlic into your pot with the olive oil and gently simmer until fragrant, ensuring you don't burn the garlic. Stir in the onions and cook until they are soft but not browned (sweat). Stir in the chilli paste and add the capsicum and cook until soft.


 Once you have done this, add the fresh herbs - sage & thyme and stir them in.


Add in the tinned tomato's, passata and beans.


Stir in the anchovies (they will dissolve into the sauce and add a wonderful richness)

Add salt & pepper to taste

Lid on - and simmer over low heat for 30 mins (stirring occasionally).


2. Organic poached eggs


Ingredients

4 eggs
100ml vinegar / litre of water

Heat water and vinegar in a deep pot until the bubbles are foaming on the bottom, but not breaking the surface (this temperature is very important).
Crack each egg into a small cup and gently place into the middle of the liquid.
As the egg falls through the water, it should set into an egg shape and then float to the surface when the white is set.
Cook until the white is set and the yoke is still runny - approx 2 1/2 - 3 minutes according to the size of your egg.
Remove from the liquid with a slotted spoon & drain on absorbent paper.
Trim edges to make it look pretty!

Serve on fresh sourdough with a curl of avocado & a splosh of our yummy Tuscan beans!


Buon Appetito! -X-


Friday, February 24, 2012

The Help / Featured Weekend Movie


We settled in to watch "The Help" tonight and loved this story. An emotional account, no doubt typical of so many lives , not just in Southern USA in the 60's - but all around the world. Good will always eventually win over evil - it's only a matter of time. If you haven't already seen it, then hire it this weekend! Minnie's cooking makes you want a big bowl of Southern fried chicken! We'd skip her chocolate pie though ;) 

Thursday, February 23, 2012

Thursday's Cooking tip / How to Ripen Avocados

Need to ripen avocados quickly? Place avocados into a bowl or paper bag with ripe bananas! The ripe bananas give off a gas that helps to speed up the ripening process. This works for us every time and will give you ripe avocados for the following day, to enjoy as you so wish.


Tuesday, February 21, 2012

Bok choy with Poached chicken, Spring onion, chilli, garlic & ginger sauce

We have been missing Asia lately...mainly because we have recently been in touch with our friends, who still live in Hong Kong, and who we miss so much! That, and also the fact that another friend has just arrived back on Australian soil after spending an entire month in Thailand - yes a whole month, Lucky indeed! We also have another friend living in Chiang Mai who teases us with all the wonderful food he is enjoying! So, it goes without saying, that I have been totally inspired this week to create and cook a new recipe! I was so pleased with how everything came together. The flavours, textures and colours of this dish take you on a wonderful asian journey. So close your eyes and enjoy every mouthful *^^*

Bok choy with Poached chicken, Spring onion, chilli, garlic and ginger sauce
serves 2


Mise en place (everything in it's place)
place 1 1/2 cups brown rice
into rice steamer and let cook
Meanwhile start chopping
2 cloves garlic finely chopped 
2 tbs finely chopped ginger
1/2 large red chilli finely sliced
 (most seeds removed)
2 tbs peanut oil
2 tbsp dark soy sauce
1 1/2 tsp sesame oil
1 bunch bok choy ends
 removed, washed
to remove grit
 remove tops
 and roots of spring onions
and wash, then
slice lengthways down centre 
of all 5
reserve 1 tbsp of dark green
spring onion leaf
slice as thin as possible (chiffonade)
this will be used later
Bring shallow pan of water to boil
with 3-4 large slices of ginger (skin on)
and a few sprigs of corriander, then reduce
to poaching temp
 (no bubbles coming to service
but still HOT, so low heat)
at the same time bring another 
pan or wok of water to boil
and place bamboo steamer
over top to steam veggies
Bok choy and spring onions
will take 4 minutes to steam
same time as chicken (below)


ginger slices and coriander will
infuse their flavour into water
leave for 15 mins, then add thin chicken slices
(we used 1 chicken breast)
and continue poaching for 2-3 mins
chicken will be moist,
 tender and white in centre
place in bowl, cover
and out aside


Bok choy and Spring Onion
steamed and ready to eat

Add chopped chilli, garlic, ginger
steamed spring onion halves
and 1 tbsp dark green spring onion
finely sliced into small
heat proof bowl
In a wok or fry pan heat 2 tbs 
peanut oil to smoking point 
over high heat 
(you can test that your oil is HOT enough
by sticking the end of a bamboo skewer
in it. If oil bubbles and hisses it's ready)
Remove from heat and immediately
pour over your mixture in bowl
then pour in your soy sauce,
sesame oil and mix through 


everything is mixed through and ready
to plate up

Serve your rice on plate
add bok choy first, 
then chicken slices
then carefully spoon mixture 
over chicken

ENJOY! -X-

Monday, February 20, 2012

Stressed is 'desserts' spelled backwards / Sweet Mondays

So, who wakes up on Mondays feeling bouncy and ready to go...? Not us! Mondays are usually stressful in one form or another, right? What we love about the word 'stressed' is that if you spell it backwards it says 'desserts'...now that's a lot to smile about! Each Monday we will be posting a delicious dessert recipe, to help make Mondays a little easier...stay tuned.

Friday, February 17, 2012

Singing In The Rain / Featured Weekend Movie

Spaghetti with rich tomato and anchovy sauce

We enjoyed watching thunderstorms through our living room window yesterday, and the flickering candlelight inside, while cuddled up on the couch together. It felt like Autumn had arrived early. The rain against our window made me think of a favorite movie and song "Singing in the rain"...and dinner. So I searched through our pantry and fridge to see what I could find (because neither of us wanted to go out in the rain, we were enjoying it just fine from within the comforts of our home). Unfortunately, we broke our committment to "no pasta" through the week (we LOVE pasta, and over indulge too often). Anyway, what were we to do? It was too wet to go outside...remember...As it turns out, I was able to bring together a wonderful dish and create a brilliant new recipe! To those who don't like anchovy, please try this, I promise it's nothing like eating one on a pizza. The anchovy fillets in this sauce disintegrate into nothing leaving a truly beautiful flavour. Adding the fresh basil and parsley 10 minutes before serving gives an incredible burst of flavour, without overcooking the fresh herbs. This is a delicious rich sauce that is the perfect accompaniment to a stormy evening. So enjoy your cooking, light some candles, and nestle in enjoying some pasta and "Singing in the rain".

Spaghetti with rich tomato and anchovy sauce
serves 3

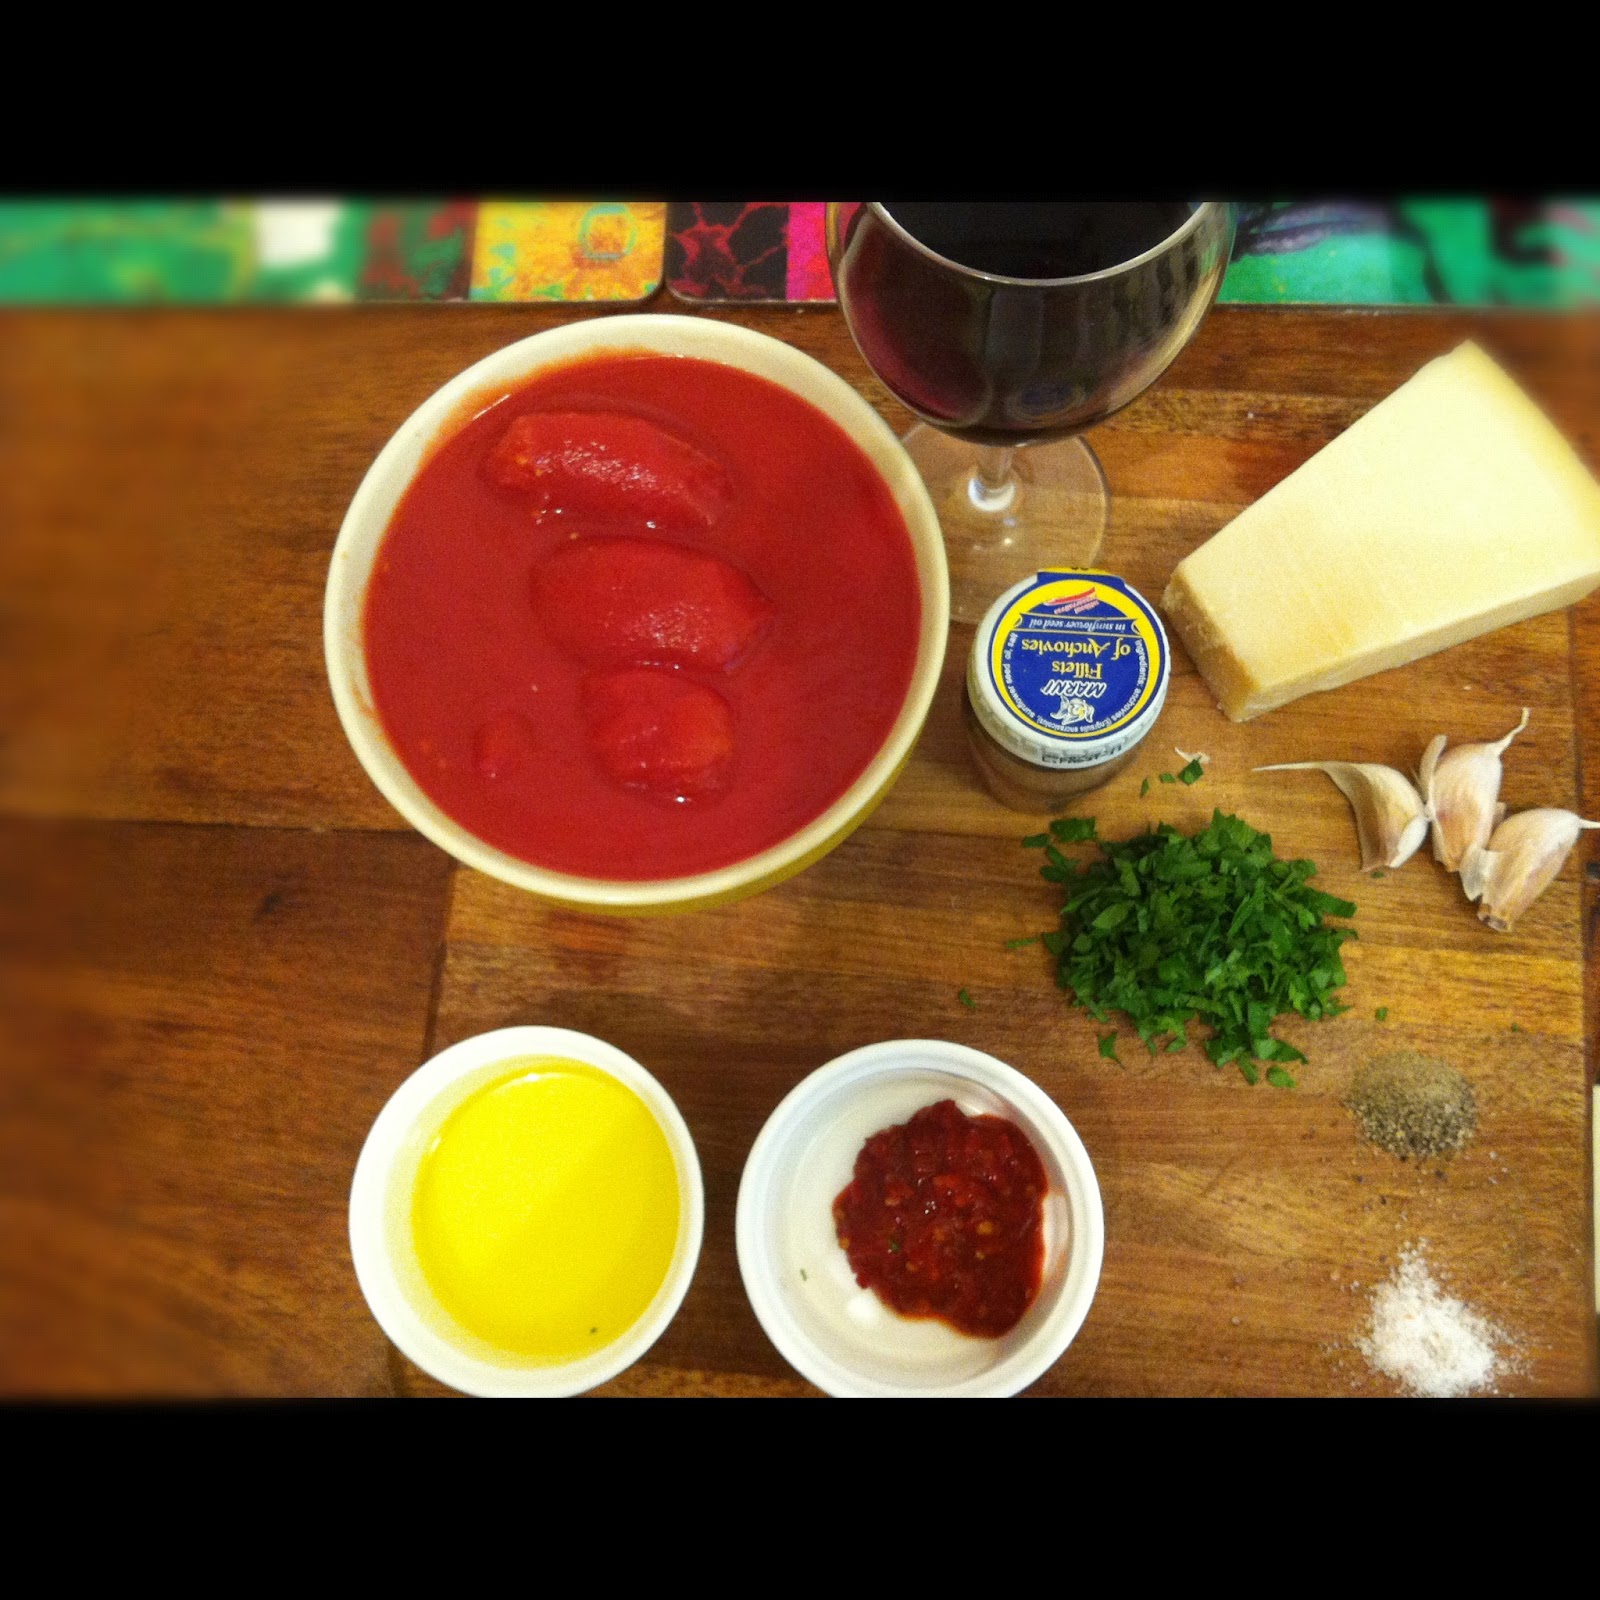
Mis en place "everything in it's place"

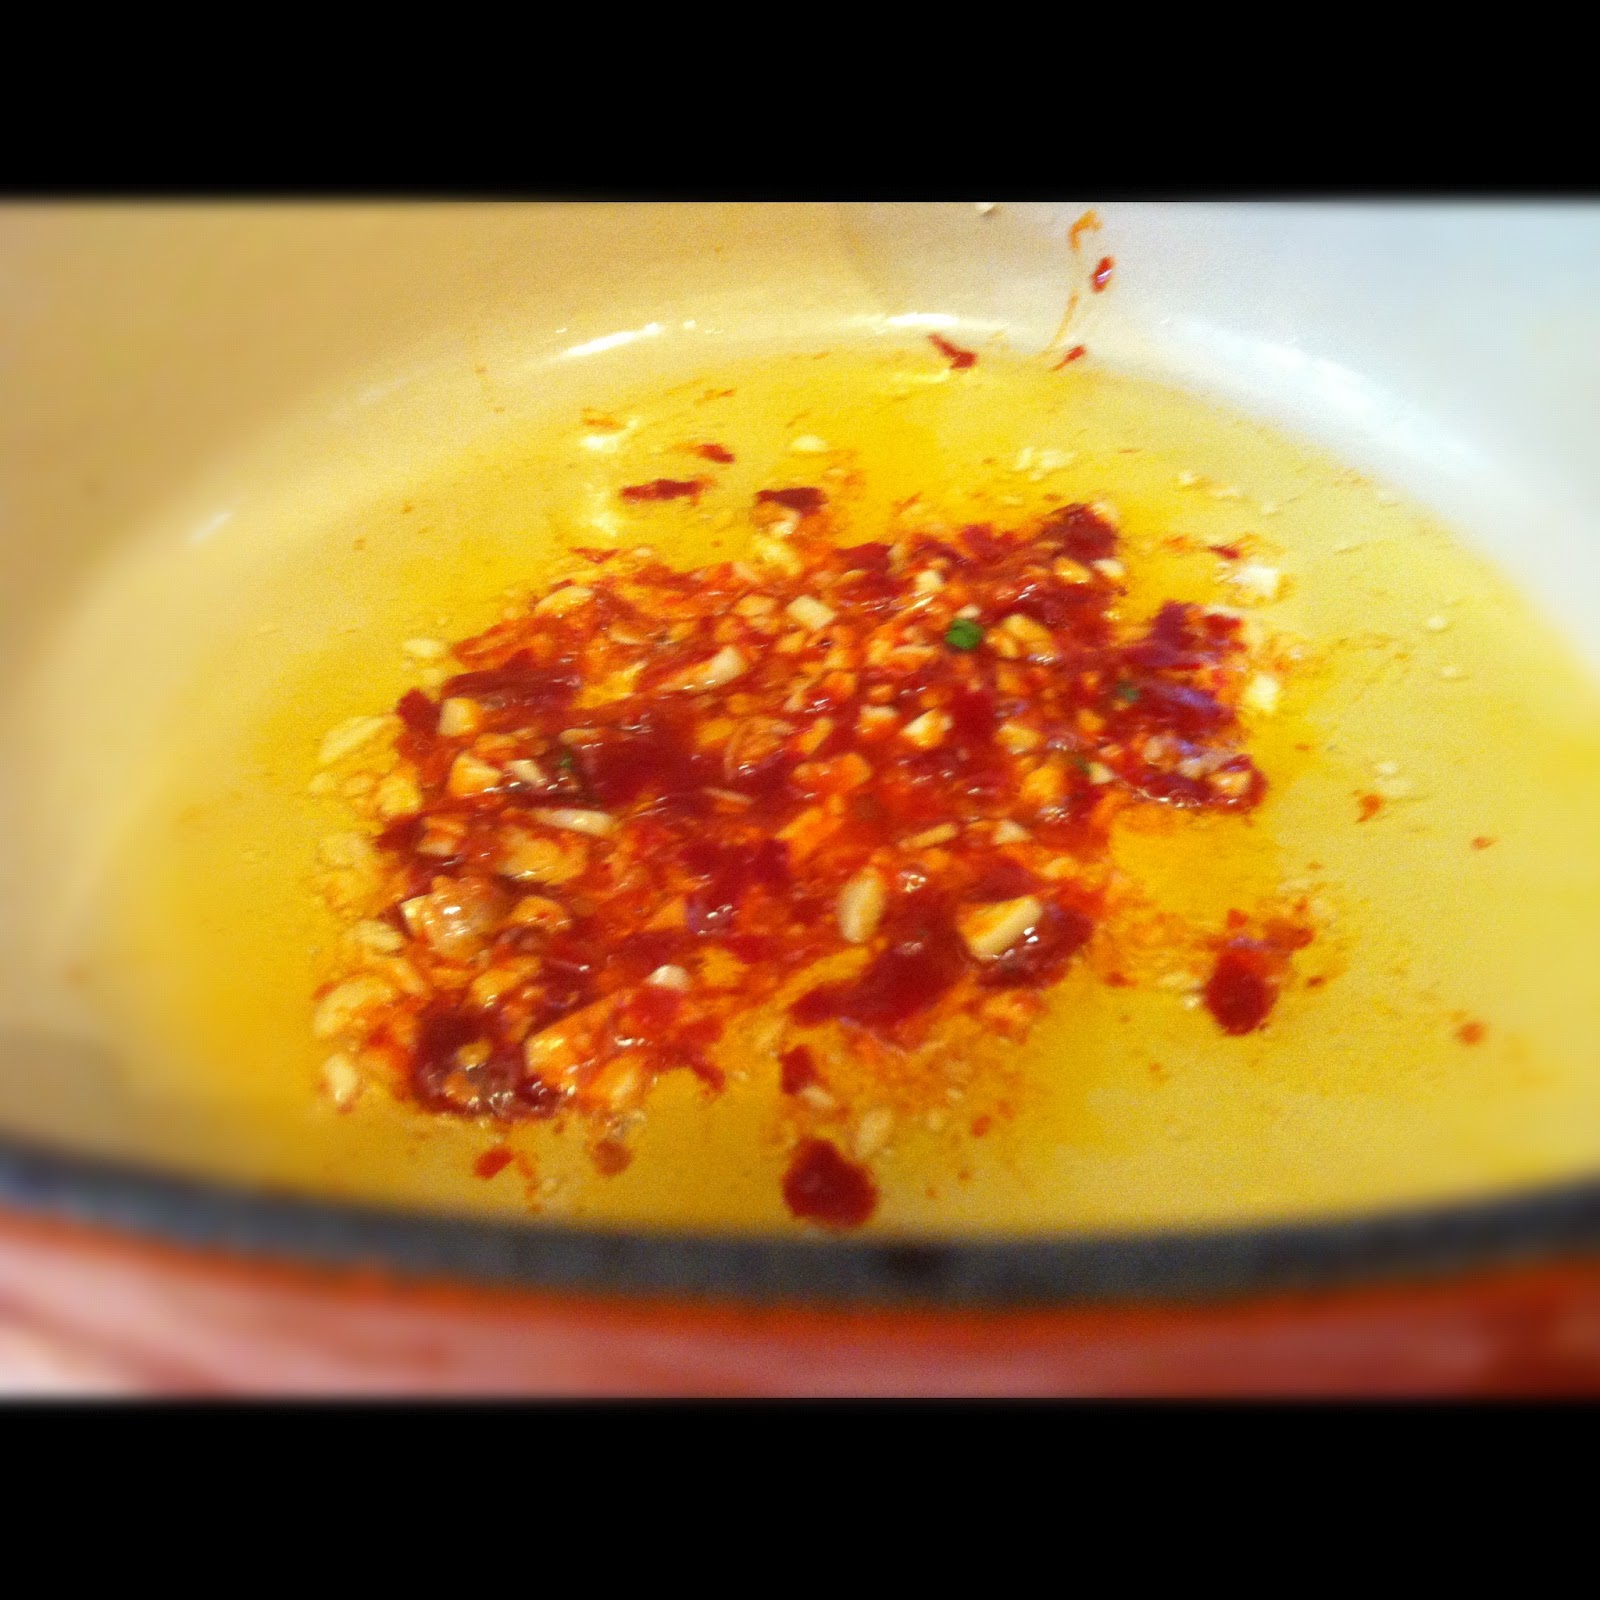
Heat olive oil, then add
chopped garlic and chilli
and stir as it infuses into oil
for a few minutes
 keep an eye on it as
you don't want garlic
to brown
Add tomatoes to pan
and crush up
with wooden
spoon
turn up heat
add red wine and allow
alcohol to evaporate for
 a few minutes,
continue to stir
Add anchovies and
 cracked black pepper
to sauce and stir
at this stage sauce should
be on a gentle simmer (low flame)
leave to cook for 30 mins,
 stirring occasionally
with lid off
With 10 min to go
add 4 basil leaves
chopped parsley
and a pinch of salt
and stir into sauce
*anchovies do add salt to the
sauce, but another pinch
was necessary
cook your pasta al dente
Sauce is ready!

Drain your pasta
and toss through sauce
add 1 heaped tbsp

parmigiano reggiano cheese
Served and ready
to eat!

Ingredients

3 cloves garlic finely sliced
2 tsp organic chilli paste
5 tbsp olive oil
x2 400g tinned tomatoes
a small handful flat leaf parsley
4 basil leaves
4 anchovy fillets
1/2 glass of red wine
pinch of cracked black pepper
pinch salt
1 heaped tbsp reggiano
1 pkt spelt pasta
 (or the pasta of your choice)
drizzle extra virgin oil to serve


Buon Appetito!
 -X-


Cheese and Sun-dried tomato toasts / Breakfast

As the weekend near approaches, we would like to share with you a delicious Italian treat.
We enjoy nothing better than a lie in, followed by a walk to our local florist to select some gorgeous flowers for our home, and listening to some chilled out music while we cook breakfast. 

This recipe from Antipasti - A delicious array of Italian recipes is one of our favourites for its flavours, textures and rustic look. We used ciabatta rather than sfilatino bread, and we bought marinated sun dried tomatoes from our local deli and pulsed them in the blender.

Toast al formaggio e pomodori secchi
"cheese and sundried tomato toasts"
serves 2


Ingredients

x4 thick slices ciabatta bread 
4 tbsp sun-dried tomatoes
300g fresh mozzarella
 drained and sliced
dried oregano 
(enough to sprinkle on top)
good quality olive oil
(enough to drizzle over top)
cracked black pepper

Take your sun-dried tomatoes and place in blender. Pulse until roughly chopped. Place in bowl and place aside
Slice the bread diagonally and discard the end pieces
Toast the slices on both sides under a preheated grill until golden
Spread one side of each toast with the sun-dried tomatoes and top with mozzarella
Sprinkle with oregano and season with pepper
Place the toasts on a large baking sheet and drizzle with olive oil
Bake in a preheated oven 220 degrees for about 5 minutes, until the cheese has melted and is bubbling
Remove the hot toasts from the oven and leave them to stand for a minute before serving

ENJOY! -X-


Tuesday, February 14, 2012

Strawberry Mille Fuille Tower / Puff pastry

Naughty but nice...be warned! These little darlings are scrumptious and very hard to stop at one...
As you take each mouthful you are taken to a place of pure ecstasy. Life is short, so pleasures like these must be enjoyed - at least occasionally. The good news is these are super easy to create and are dressed to impress!


Strawberry Mille Fuille Tower


Ingredients 

Puff pastry (thawed sheets)
1 cup thickened cream
1-2 tsp caster sugar
(depending on how sweet you want it)
punnet strawberries
2 drops vanilla essence 
icing sugar (for dusting)

Wash strawberries. Cut them in half and then make thin slices. Place into bowl, cling wrap and set aside
Take sheet of puff pastry and place onto clean work bench that has been dusted with lots of caster sugar
Roll out pastry with rolling pin to about 1-2mm thickness
Cut out 5-6cm discs and continue until you have got the desired amount, repeating steps with more pastry sheets. You will need 1 1/2  pastry discs per tower
Preheat oven to 210 degrees
Lightly grease oven tray and place discs on tray sugar side up
Discs will rise (puff) when cooking
Cook until slightly golden - about 10 mins, maybe less, so keep an eye on them
Meanwhile, whip your cream with a beater or whisk (beater easier). Add caster sugar to and vanilla essence to cream. You are now ready to thicken your cream. Beat until stiff peaks form. Be careful not to over beat as your cream will turn into butter
Remove pastry discs from oven
Allow to cool
Gently slice discs in half. When building towers make sure you use the top off pastry discs for tops and bottom of pastry for base
When building towers don't go overboard with cream, otherwise your tower will collapse and not stand upright
Spread cream onto base disc 1, top with slice strawberry, top with disc, gently place cream on disc, top with slice strawberry and place final disc on top
Plate up and continue your process of building your towers
Your last step is to dust the top of your towers with icing sugar. You can do this by placing some icing into a strainer and lightly tapping over your towers

ENJOY! -X-


Monday, February 13, 2012

Rich Italian tomato sauce / slow cook

We had some time to spare this weekend, time enough to plan some slow cooking, rich flavoured comfort food from heaven (Italy). This dish epitomizes everything we love about food. It is born from rich Italian heritage and offers an aroma and flavour that generations before us have cooked & loved.

This food is cooked the old traditional way - as you cook through its stages you can almost feel a generation of Italian Nona's watching over your shoulder to check on your every move and gently guide you back on course if you were to stray from their tried and tested method.

This sauce is the real Italian deal. It has never been truer the saying  - you reap what you sew. 

If you love Italian food, really love it to its beautiful cultural roots - you must take this culinary journey as though taking a walk through the hills of Tuscany itself.  This is perfect for a Sunday afternoon of cooking and makes for the perfect Sunday night dinner. I hope you enjoy making it as much as we do! My husband and I make a great team in the kitchen. While I made the sauce he prepared fresh pasta to go with the sauce. Fresh pasta post will be coming soon...we are constantly inspired by the many great chefs of the world. This recipe was inspired by Tobbie Puttock's slow cooking. We hope you enjoy our version...x

Rich Italian slow sauce
serves 4

STAGE 1
900g lamb chump chops
 (from good quality butcher - great for stewing)
2 onions, roughly chopped
3 carrots, roughly chopped
2 bay leaves
4 celery sticks, roughly chopped (discard leaves)
pinch salt
pinch cracked black pepper

STAGE 2
4 tbsp olive oil
3 cloves garlic, finely sliced
1 onion finely sliced
2 carrots, finely diced
3 celery sticks, finely chopped
1 generous tbsp rosemary, roughly chopped
1 large fresh red chilli, seeded, finely sliced
1 1/2 glasses of dry red wine - we use Shiraz (Reilly's Clare Valley 2008)
2 x 400g tinned and diced tomatoes
pinch salt
pinch cracked black pepper
extra virgin olive oil for flavour
finely chopped parsley leaves to garnish
parmigiano reggiano to garnish

STAGE 1 Mirepoix
vegetables cut roughly
(will be discarded later, so no need to finely chop)
Add Mirepoix to large pot
Add Lamb chump chops
to Mirepoix
Add water just covering ingredients
add bay leaves
pinch salt,
 cracked black pepper
bring to boil, then gently simmer
checking meat every ten minutes to make
sure water level stays above the meat
most of the time
the meat should be tender, almost
falling apart after 2 hrs
(if it isn't keep cooking)
once done remove pot from heat and allow
meat to cool to room temperature
Now you can begin STAGE 2
seed and chop large red chilli
finely chop garlic
Finely chop Mirepoix (carrot, celery, onion)
finely chop rosemary
Put the 4 tbs of olive oil in large saucepan
Add finely chopped Mirpoix, rosemary
garlic and chilli
sweat over gentle heat for 15 mins
(sweat means to cook without colour
-don't brown the vegetables) see below
vegetables soft and cooked without colour
Pour in red wine (shiraz) and allow to evaporate
Meanwhile, transfer meat from pot (STAGE 1)
to bowl and set to one side
Strain the meats cooking liquid and
pour into saucepan
over the vegetables and
red wine (STAGE 2)
discard STAGE 1's boiled vegetables
This is what the liquid looks like
after removing the meat and vegetables
from STAGE 1. This liquid then poured
into saucepan with red wine
Raise the heat under vegetables, wine
and cook until the liquid has reduced by half.
At this stage, add the tomatoes, salt/pepper

Again, reduce the liquid, this time
to a level that just covers the vegetables
this will take a little while...
stir occassionally, so nothing sticks
Once sauce reduced, remove the
saucepan from heat and allow
sauce to cool
Tear meat into little shreds
discard fat
add meat to the cooling sauce
add as much or as less meat
as desired - meat will absorb sauce
so if you prefer more saucy add
less meat
 (reserved meat can be used in another sauce
or sandwiches)
add to sauce 1 tbsp extra virgin
olive oil and garnish with a handful
of parsley
Serve immediately with fresh pasta and
Parmigiano reggiano (parmesan)
(you can refrigerate for later use and it will
last 4-5 days)


Enjoy with a crusty bread and red wine

 buon appetito!

 -X-


**As always, try to buy quality produce by visiting farmers markets
and quality butchers. They love your support